Workspaces
A workspace is the container for everything you build in SuperToolMake: your data connections, your apps, your roles, and your users.
SuperToolMake has a single workspace. It is created automatically the first time you start the instance, and you land directly in it after logging in — there is no workspace switcher and you don't create workspaces yourself.
Creating an admin user
The very first time you open the builder you'll be prompted to create an admin user. The admin user has full access to the instance.
Open the builder at localhost:10000/builder
(replace localhost:10000 with your own host and port if you've changed them), then:
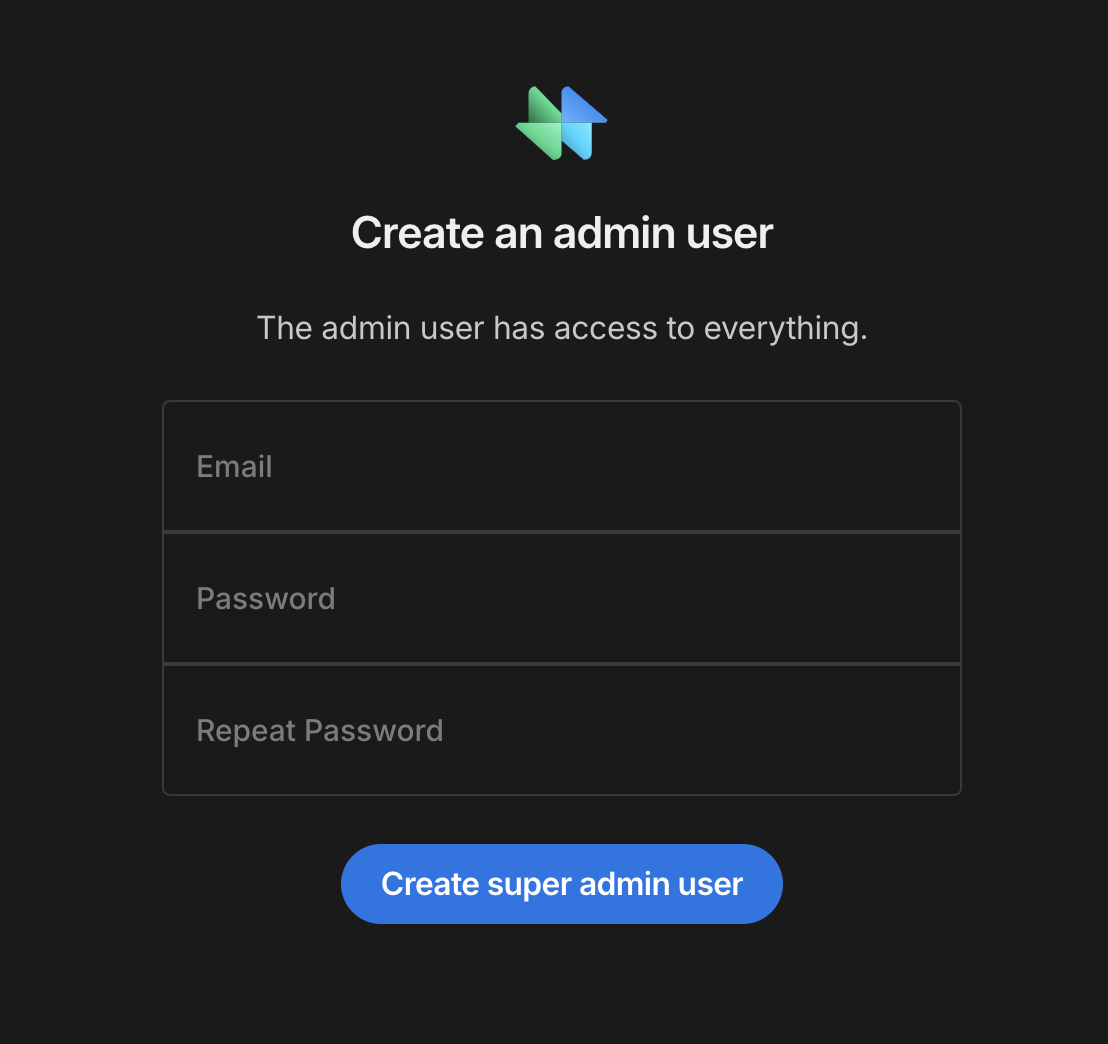
Enter an email address and a password, confirm the password, then select Create admin user. You'll be logged in and taken straight into the workspace.
Keep these credentials safe — the admin account can manage every user and role in your instance.
You can skip this screen entirely by bootstrapping the admin user with environment variables.
What's in a workspace
Once you're in, the left-hand navigation gives you access to everything in the workspace:
- Apps — design end-user apps and screens.
- SQL tables and APIs — connect and work with your data.
- Access control — roles and users.
- Settings — configure the workspace and publish your apps.
Next steps
A typical first run through the workspace looks like this:
- Connect a SQL database or an API to bring in your data.
- Design an app with screens and forms.
- Set up access control for your end users.
- Publish your app so end users can use it.
Continue to SQL tables to connect your first datasource.